Colour grading plays a significant role in defining the mood of an image. One of the most effective techniques for achieving cinematic colour effects is split toning.
While traditionally used in black and white photography, split toning can also be applied to colour images to create dramatic and stylised results.
In Photoshop Elements, split toning allows you to add different colour tones to highlights and shadows independently. This technique can create warm golden-hour effects, cool cinematic tones, or vintage-style edits.
Whether you’re a beginner or an advanced photographer, mastering PS Elements split toning will give your images a professional touch.
How Split Toning Works
Split toning works by assigning separate colours to the highlights and shadows of an image. By adjusting these tones, you can create a unique colour contrast that enhances depth and atmosphere.
For example, adding warm orange tones to the highlights and cool blues to the shadows can create a classic cinematic effect.
Alternatively, applying greenish shadows with yellow highlights can replicate a vintage film look. The possibilities are endless, and Photoshop Elements provides simple tools to achieve this.

Setting Up Split Toning in Photoshop Elements
Before applying split toning Photoshop Elements, start by selecting an image that benefits from enhanced colour grading. Portraits, landscapes, and moody street scenes work particularly well.
Step 1: Open Your Image in Photoshop Elements
Launch Photoshop Elements and open the image you want to edit. If the image is in RAW format, you can make preliminary exposure and contrast adjustments in Adobe Camera Raw (ACR) before proceeding.
Step 2: Convert to a Smart Object (Optional)
To make non-destructive adjustments, consider converting your image to a smart object. This allows you to edit the effects later without permanently altering the original image.
Go to Layer > Smart Objects > Convert to Smart Object.
This step isn’t necessary but is useful for flexibility in adjustments.
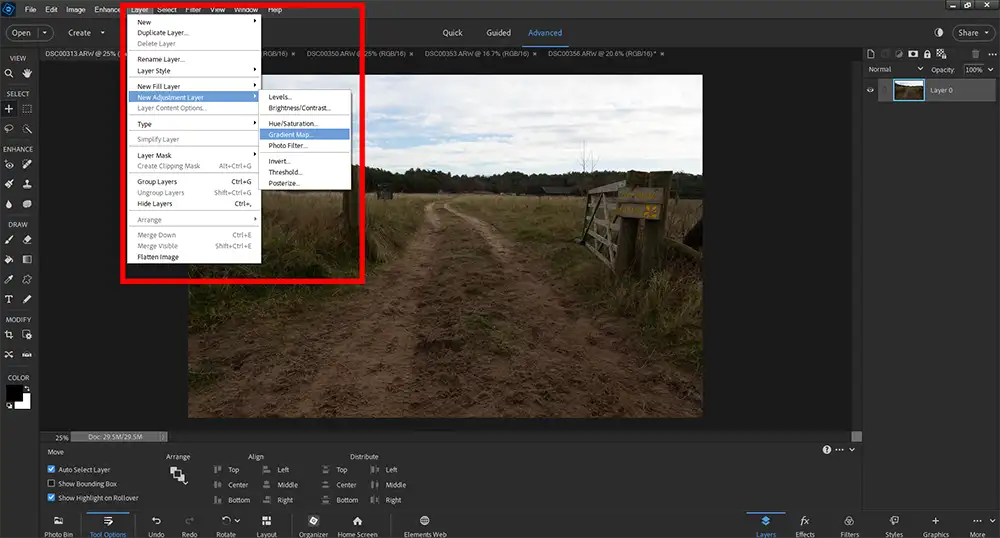
Step 3: Create a Gradient Map for Split Toning
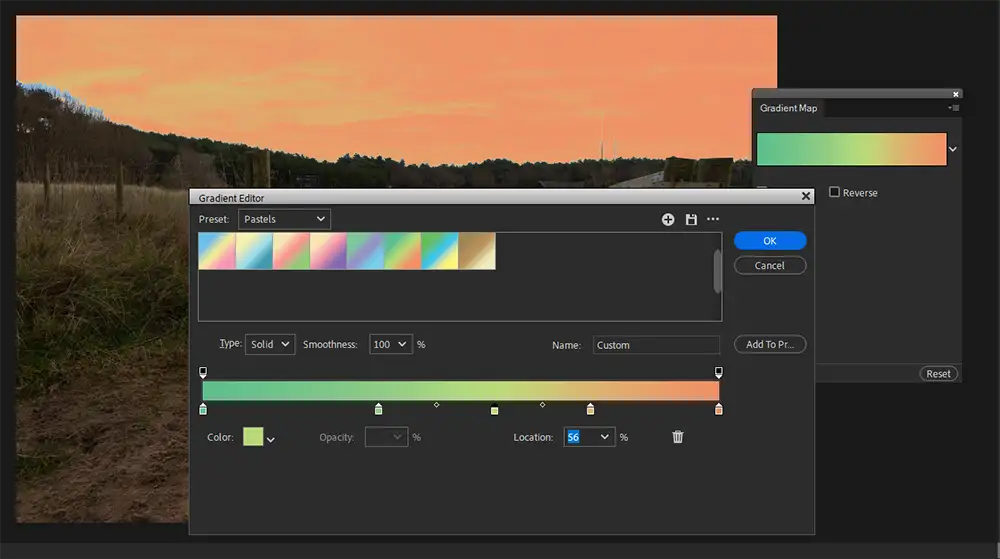
In Photoshop Elements, you can achieve split toning using a Gradient Map adjustment.
- Go to Layer > New Adjustment Layer > Gradient Map.
- A new panel appears, allowing you to apply different gradient effects to your image.
- By default, the Gradient Map will apply a black-to-white transition, affecting contrast rather than colour. The next step is adjusting it for split toning.
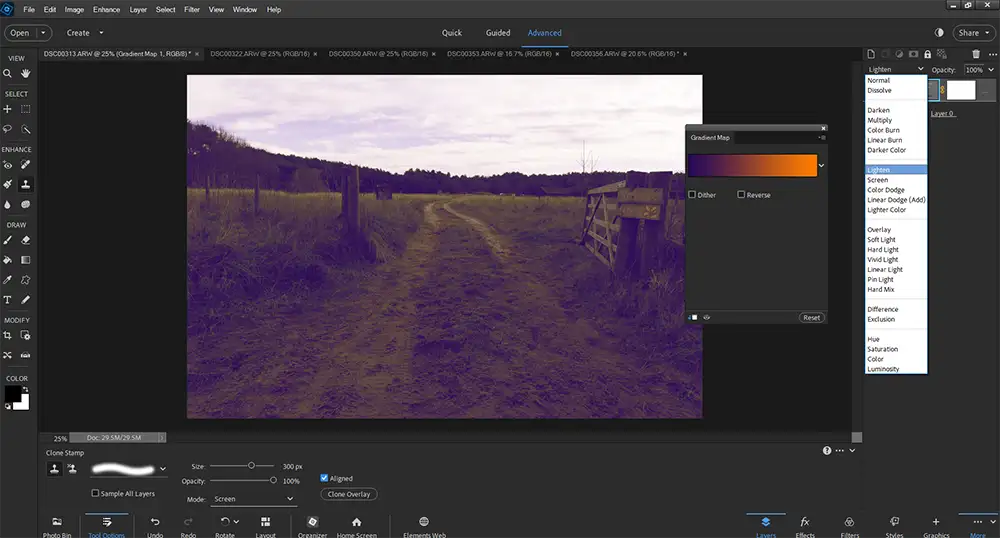
Step 4: Select Colours for Highlights and Shadows
To create a PS Elements split toning effect, you need to choose different colours for highlights and shadows.
- Click on the gradient preview in the Properties panel.
- The Gradient Editor window opens, allowing you to customise colour tones.
- Click on the left colour stop (shadows) and choose a cool tone (e.g., blue or teal).
- Click on the right colour stop (highlights) and select a warm tone (e.g., orange or yellow).
You can experiment with different colour combinations depending on the mood you want to create. Once selected, press OK to apply the gradient.
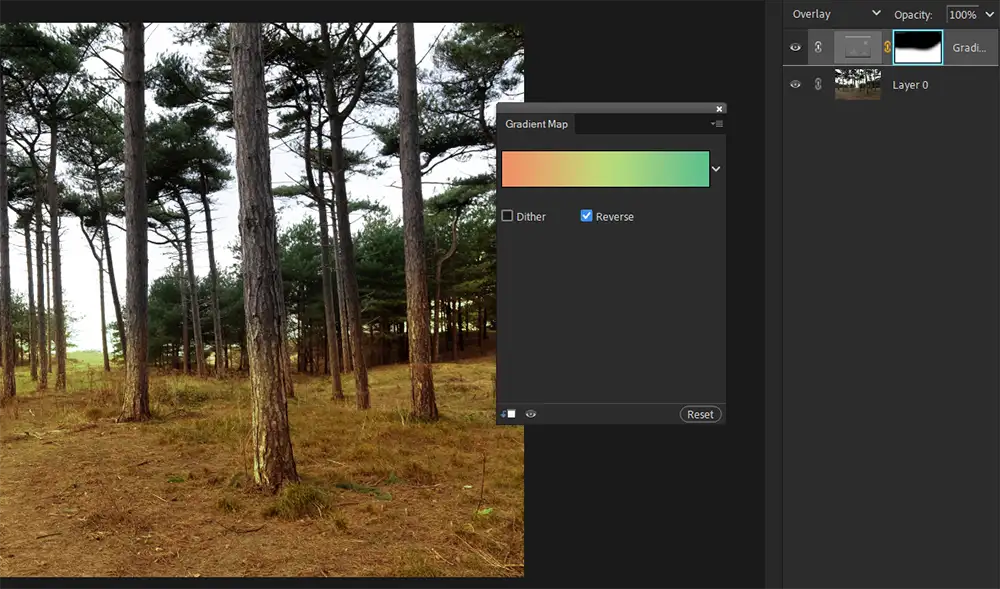
Step 5: Adjust the Blending Mode and Opacity
The initial effect may look too strong. To refine it:
- Change the blending mode of the Gradient Map layer to Soft Light or Overlay.
- Reduce the opacity until the effect looks natural and enhances the image without overpowering it.
This method keeps the adjustments subtle while still adding the desired colour contrast.

Download our Latest FREE Photography Book
Fine-Tuning the Split Toning Effect
After applying the gradient map, additional adjustments can help perfect the look.
- Adjusting the Intensity of Each Tone
- If the colour intensity feels too strong, adjust individual tones:
- Double-click the Gradient Map layer to reopen the Gradient Editor.
- Modify the opacity of each colour stop to reduce or enhance its strength.
- Shift the balance between highlights and shadows by dragging the middle slider.
Using a Layer Mask for Selective Toning
Sometimes, split toning looks great in some areas but too strong in others. In Photoshop Elements, you can mask out parts of the effect:
- Select the Gradient Map layer and click on the Layer Mask icon.
- Use a soft brush set to black to paint over areas where you want to reduce the effect.
- Adjust the brush opacity for a gradual transition.
This method helps retain natural skin tones in portraits while applying split toning more prominently to backgrounds or shadows.
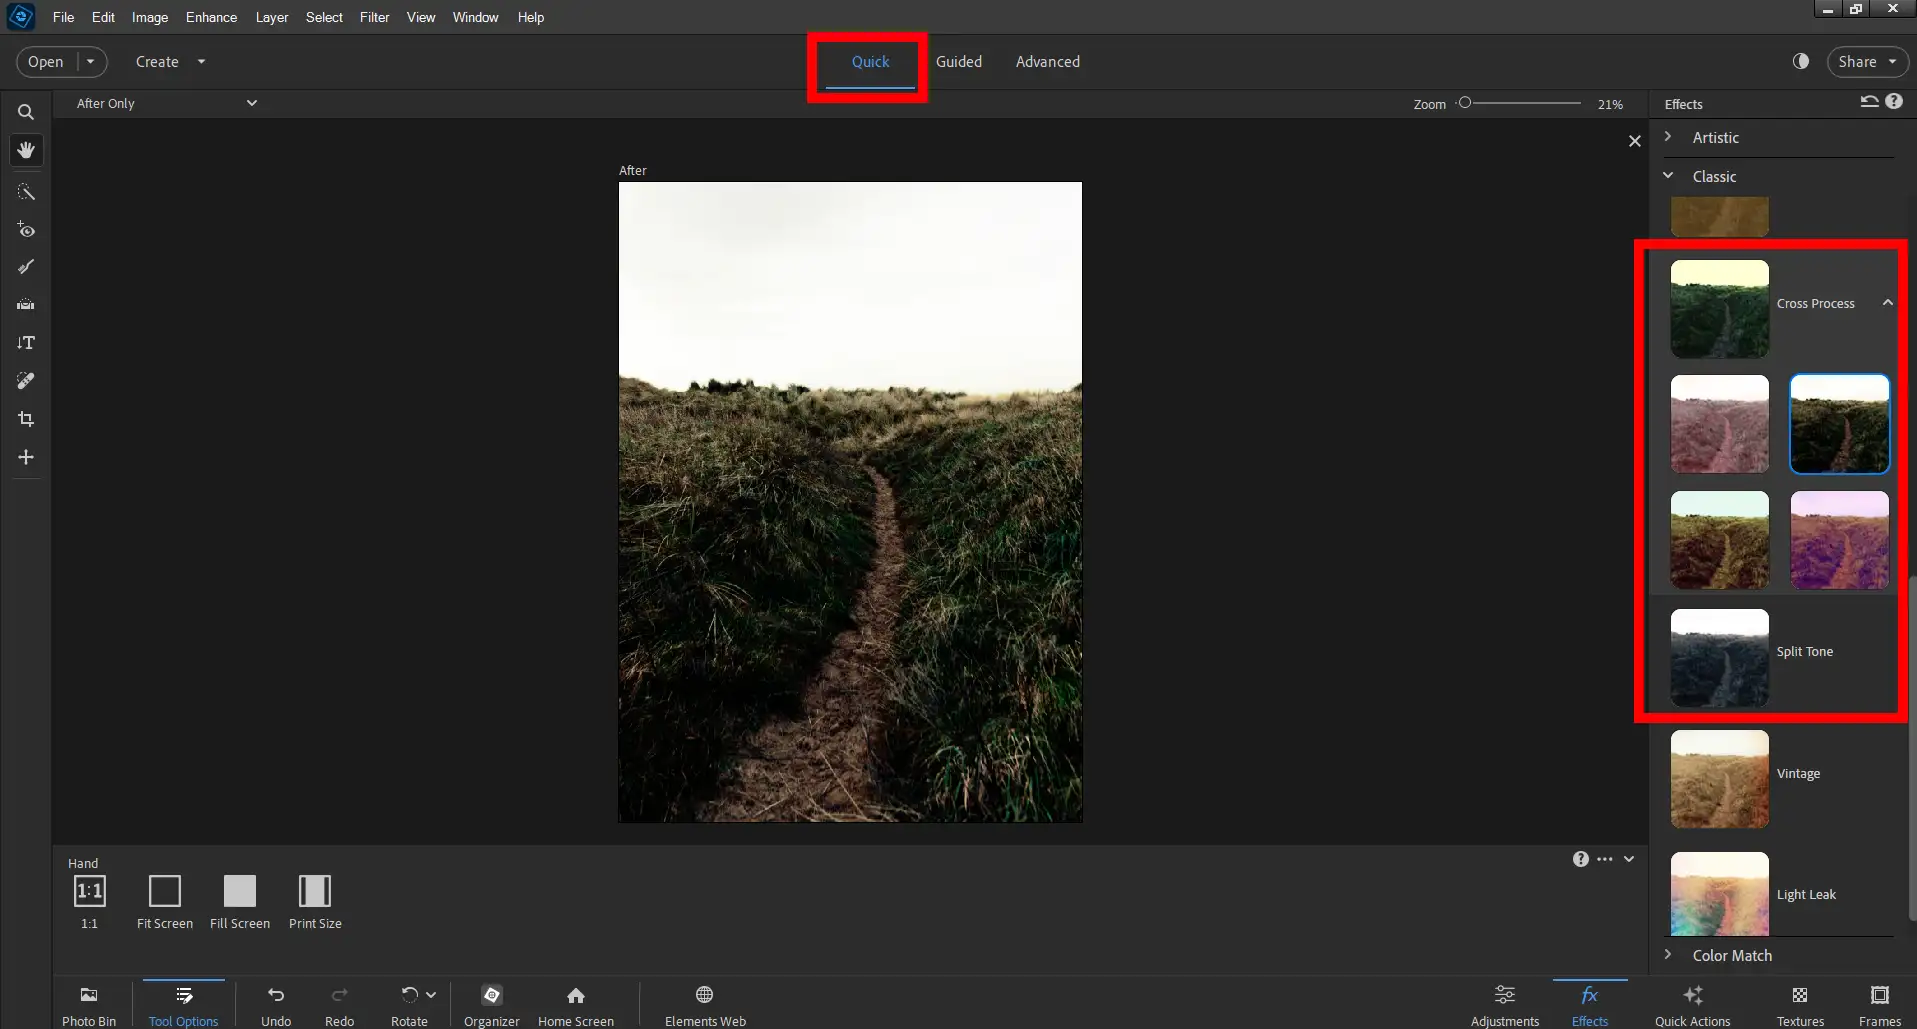
Alternative Methods for Split Toning in Photoshop Elements
While the Gradient Map method is effective, Photoshop Elements offers other ways to achieve split toning.
Using Quick Split Toning Presets
Another approach is to use the basic Split Toning and Cross Processing options in the Quick module of Photoshop Elements.
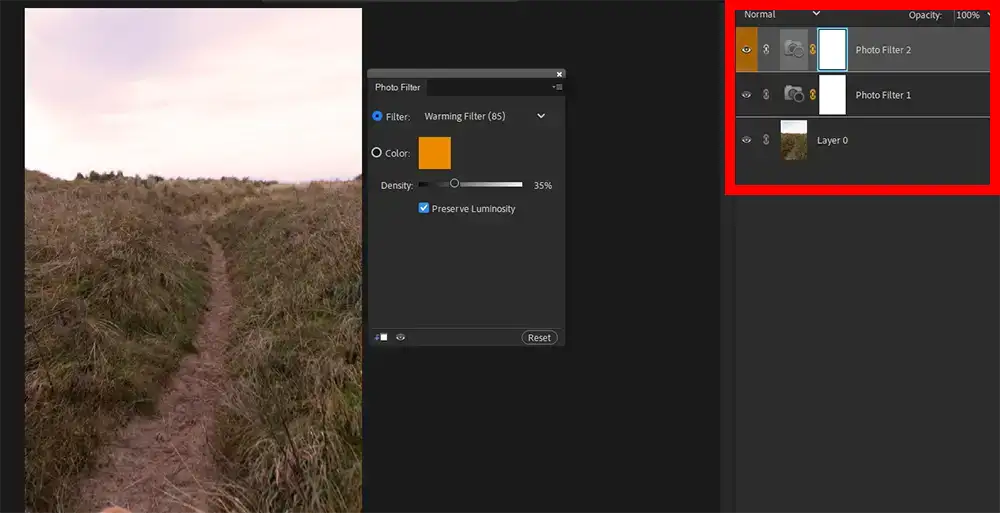
Using Photo Filter Adjustment
The Photo Filter adjustment in Photoshop Elements is useful for subtle split toning effects:
- Go to Layer > New Adjustment Layer > Photo Filter.
- Select a cool filter (e.g., cooling blue) and apply it to shadows.
- Add another Photo Filter layer with a warm colour (e.g., warming orange) for highlights.
- Adjust the density sliders to fine-tune the strength.
This technique is more flexible and allows for a softer application of split toning.
When to Use Split Toning
Applying split toning Photoshop Elements techniques enhances certain types of images more than others. Knowing when to use it can make a significant difference in the final result.
Portrait Photography
Adding subtle, warm tones to highlights while cooling shadows can create a cinematic feel. However, be careful not to overpower natural skin tones, especially in close-up shots.
Landscape Photography
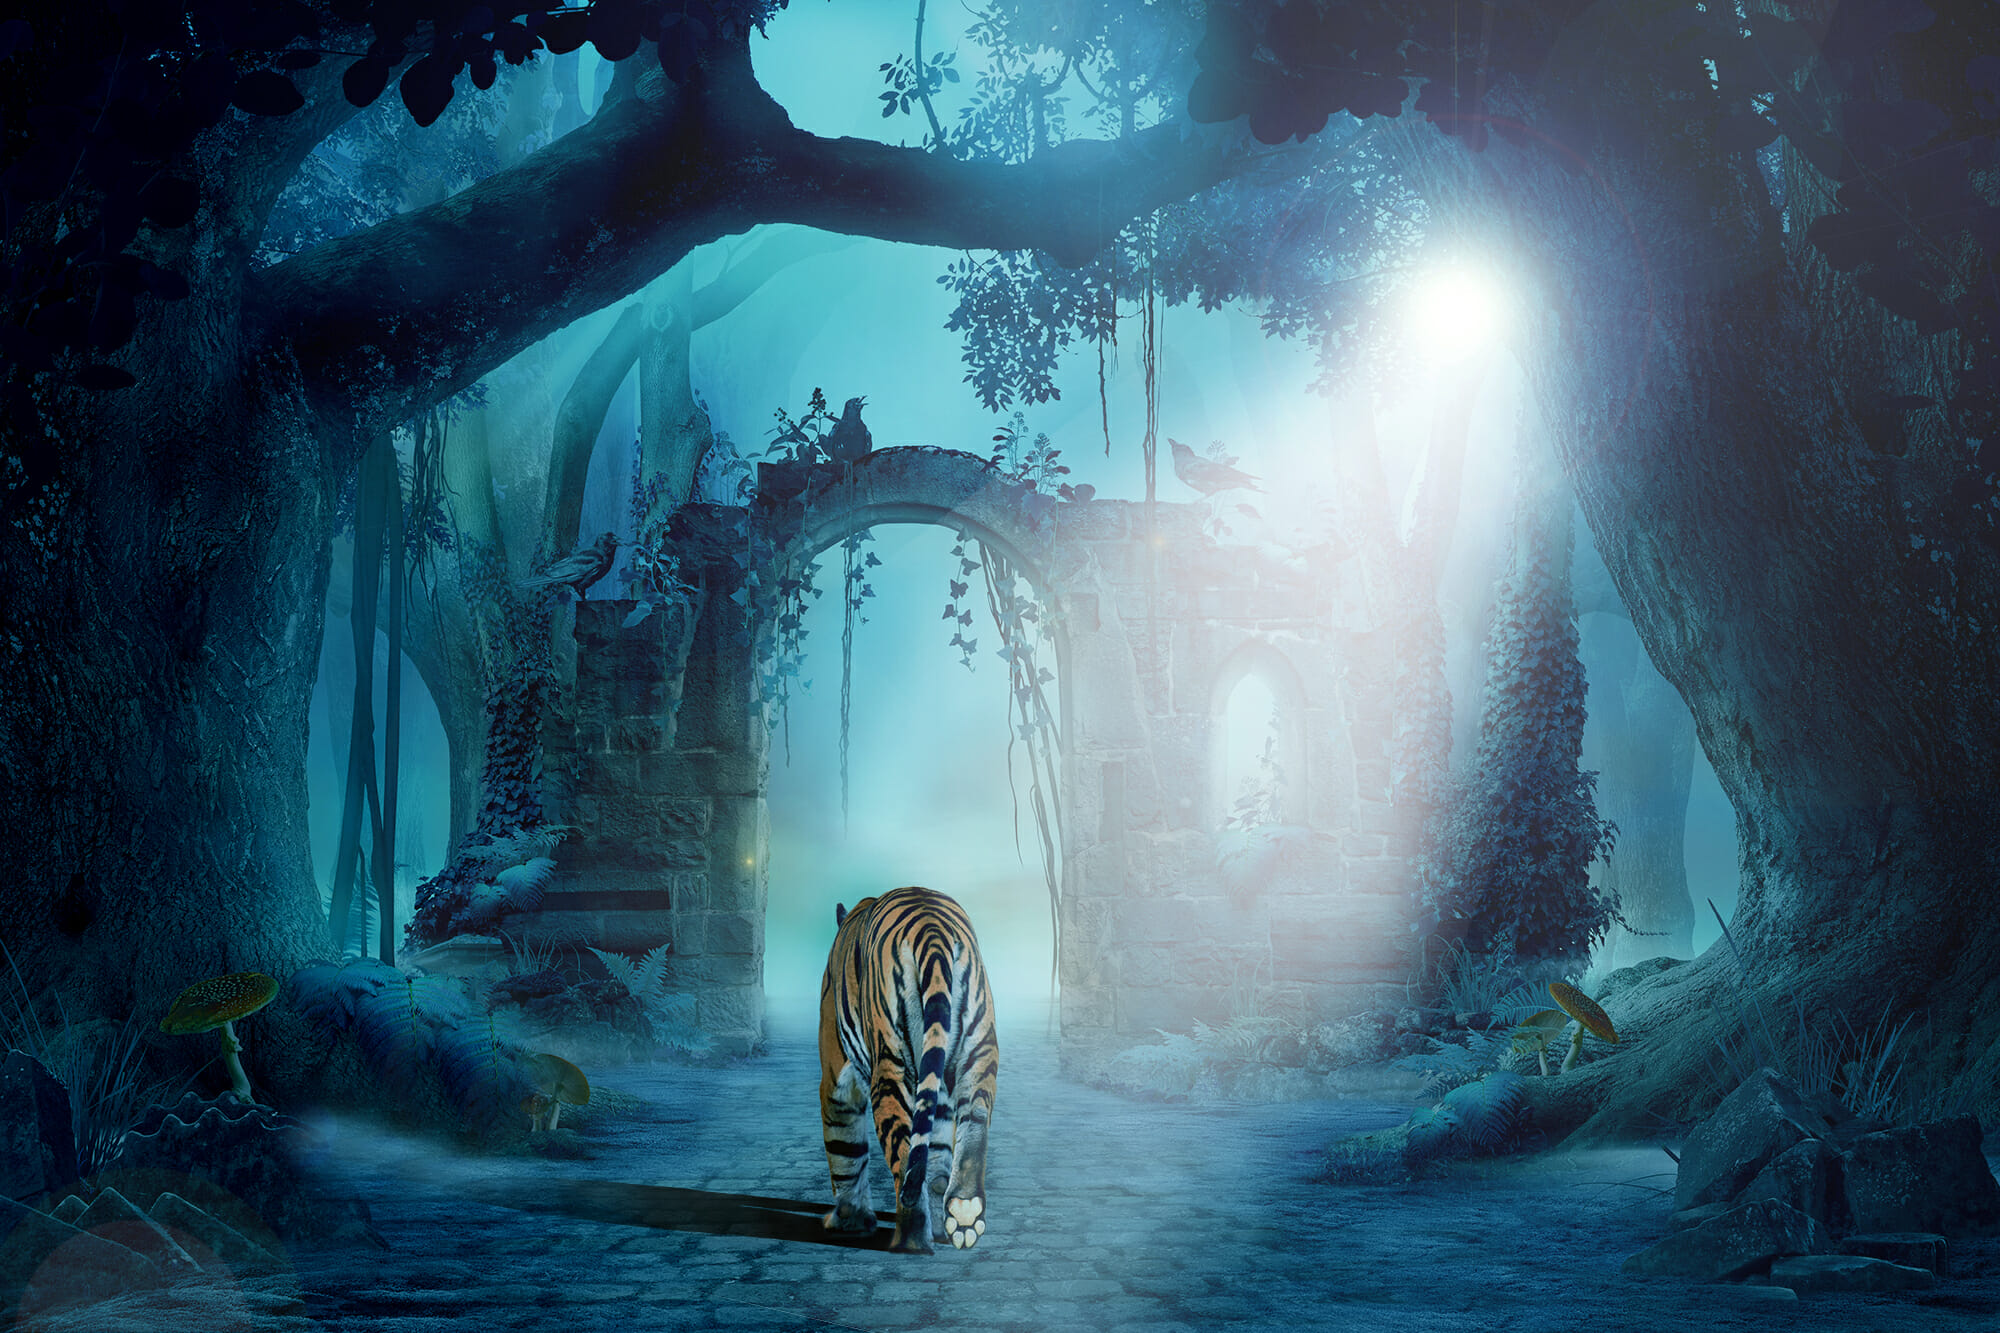
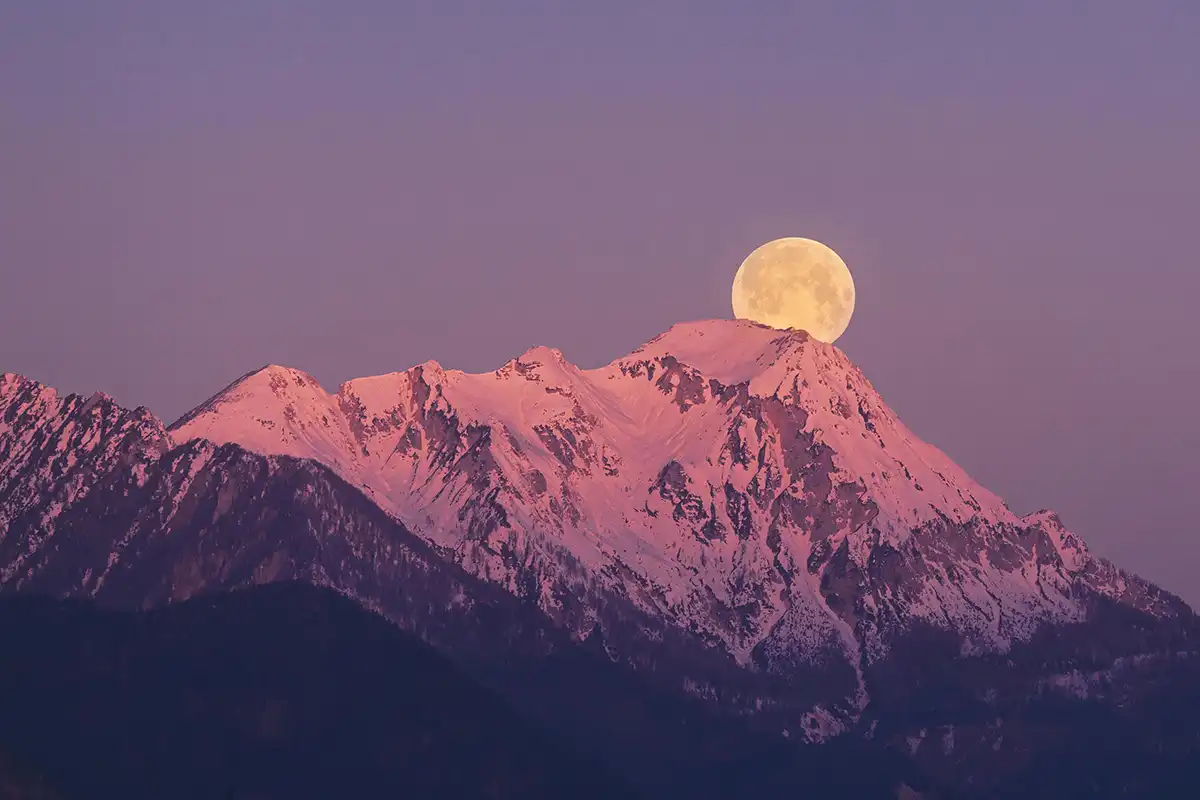
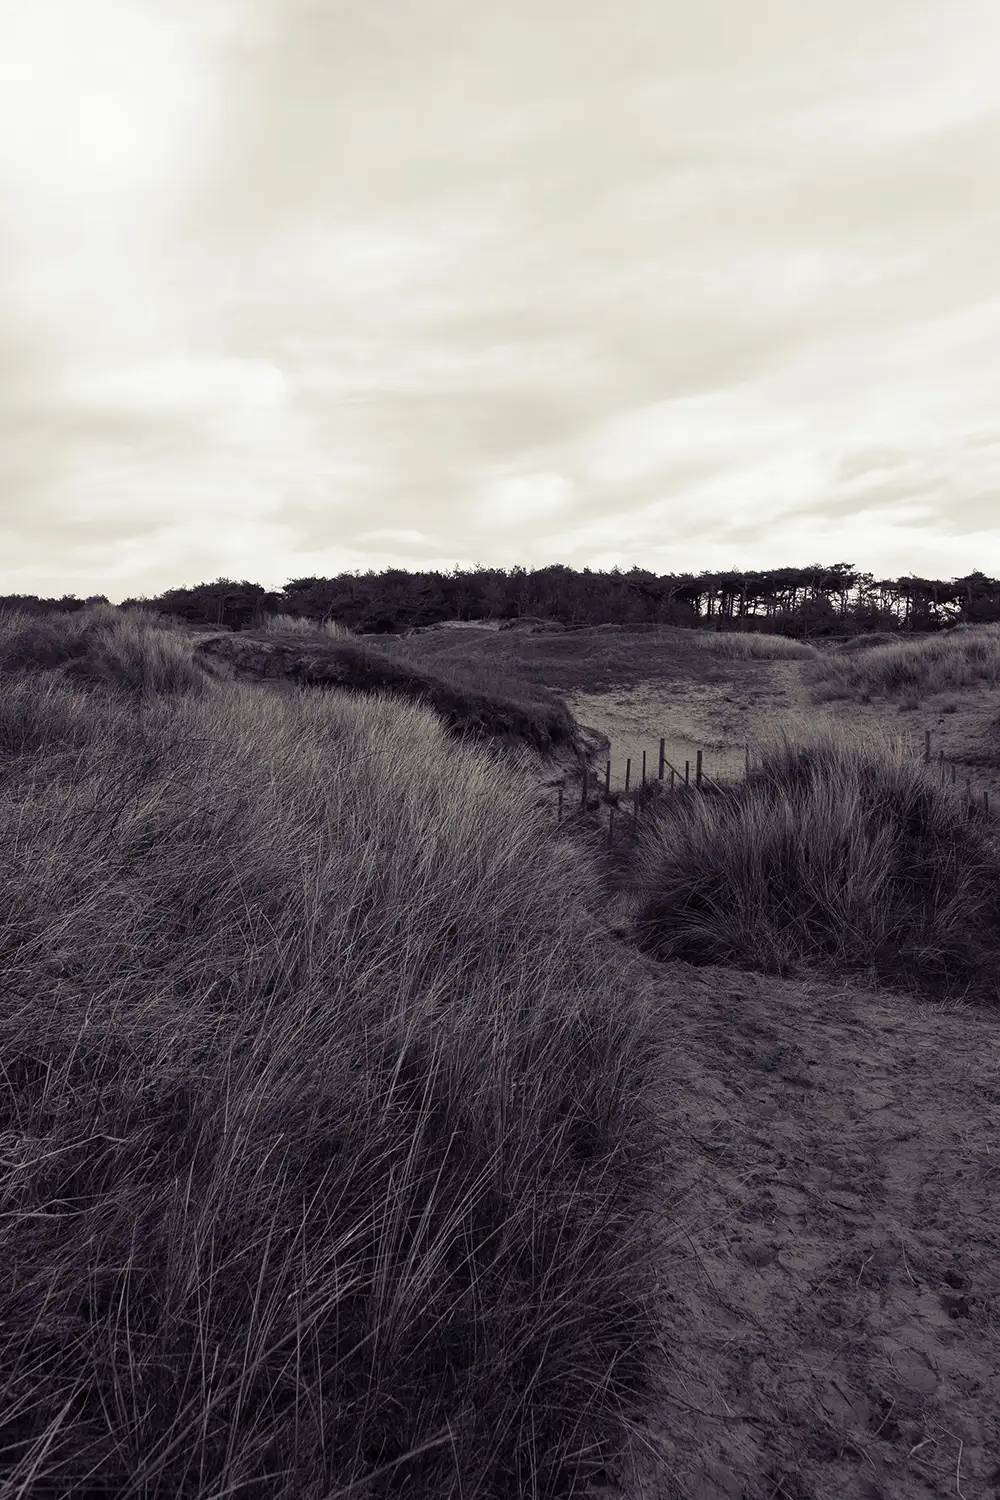
Split toning works well for landscapes, particularly in golden hour shots. Enhancing warm highlights while deepening blue shadows can add depth to sunrise or sunset scenes.
Black and White Photography
Originally, split toning was used in black and white film processing. Applying a blue tone to shadows and sepia to highlights can create a classic monochrome effect.
Conclusion
Mastering Split Toning in Photoshop Elements adds creative depth to your colour grading process. Whether using the Gradient Map, Colour Balance, or Photo Filter method, each technique provides unique control over highlights and shadows.
For a deeper understanding of digital editing techniques, explore our Photoshop Elements Course at iPhotography. You’ll gain hands-on experience in refining your images with advanced colour grading methods.
Experimenting with split toning will improve your ability to set the mood and style of your images, making your photography stand out with professional colour grading techniques.